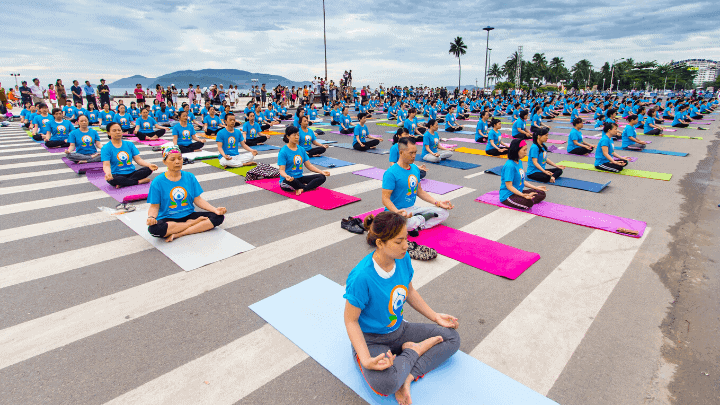
This guide gives you a detailed insight into Warrior II Pose (Virabhadrasana II).
In this complete guide you will:
- See video/text-based examples of how to do Virabhadrasana II
- Get access to the most frequently asked Warrior II Pose questions
- Find examples of how to move from Warrior II Pose to other poses
Let’s get started!
What is Warrior II Pose?
Warrior Pose, Virabhadrasana, is derived from the name Virabhadra, the mythical warrior, and asana, a yoga posture.
There are actually three commonly practiced versions of this posture in yoga, and each one is followed by a Roman numeral, respectively: Warrior I Pose, Warrior II Pose, and Warrior III Pose.
Warrior II Pose is the most straightforward of the Warrior poses and it provides the best overall stretch of the muscles and ligaments in your legs and hips. It is also one of the most accessible for beginners.
How to Do Warrior II Pose (Virabhadrasana II)
Disclaimer: Whilst Virabhadrasana II is suitable for most people, if you are suffering from lower back injury, are pregnant, or not used to physical activity; seek medical advice before participating in this and any other yoga pose.
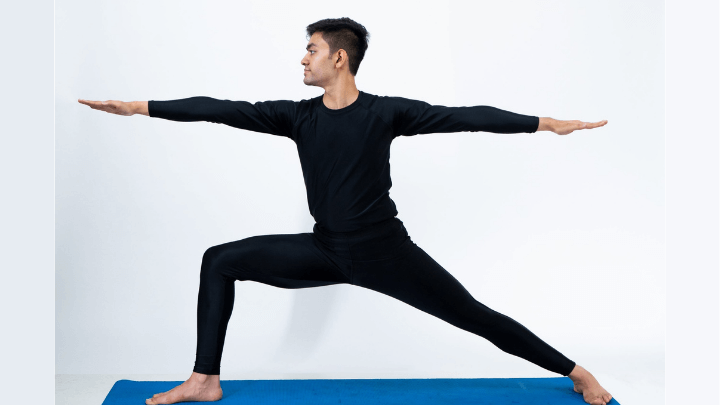
1. Begin by standing tall and strong with your hands down by your side like you would in Mountain Pose.
2. Take a wide step with your feet wider than hip-width apart.
Avoid: “clipping your own wings” in Warrior Pose by shortening your stance. Many beginners step their feet out only shoulder width. This can lead to improper alignment and limit the benefits you can gain from this pose.
3. Inhale and lift your arms out to your sides (parallel to the floor), keeping the muscles in your arms active and your fingertips actively reaching out.
4. Open your chest by gently drawing your shoulder blades together and broadening across your collarbones.
5. Press your shoulders down away from your ears to keep your neck long.
Note: You can rotate your palms skyward or keep them facing down to the floor.
Tip: Consider experimenting with both of these options (palms up and palms down). Feel it out. I tell my students to try both and then stick with whichever feels most comfortable for their arms and shoulders. Invariably, some people will prefer palms up and others like to keep palms down in this pose.
6. When changing sides from Warrior II Pose on your left to your right-hand side, you need to adjust your feet and hips accordingly. Turn your left foot slightly inward and your right foot out 90 degrees. Look down at your feet and make sure your right heel is aligned (in a straight line) with your left heel.
7. Bend your right knee until your right thigh comes parallel to the floor.
8. Press your right knee outward so that the center of your right kneecap is in line with your right big toe and your right thigh parallel to the floor.
Avoid: Bending your knee further than your toes, as this can stress out your knee joint (especially if you already have knee issues).
9. Activate your thigh and inner groin muscles.
Tip: You can make your thigh and groin muscles firm with a little bit of imagination. Pretend your yoga mat is a sheet of ice. Come on, you’re going to like this, stay with me here … Imagine you are wearing ice skates and try to glide your two feet together on the ice by pressing down through your big toes. Of course, your feet are firmly rooted to your yoga mat and so they won’t move, but can you feel what happens in your thigh and inner groin muscles when you do this action?
If you’re doing it correctly, you should feel a distinct “firming up” of the musculature. Now, your job is to maintain this action in your legs whilst bearing in mind the alignment of your knee directly over your big toe. “Seems impossible”, you might be saying to yourself. But wait … Research on muscle memory shows that with repeated practice, you’re able to remember how to do the pose[1]. This means you don’t have to think about all of these steps: Your muscles just get right back into it — no matter how long ago you last did the pose.
10. Keep your shin perpendicular to the floor. Now, you may be thinking, What about my other leg (the left one?) …
11. Firm up your left thigh muscle by pressing the outer edge of your left foot firmly to the floor. Avoid letting your straight leg be “flabby”. This is because firming up your straight leg thigh muscles helps to stabilize your pose and maximizes the benefits this strong, standing pose has to offer.
12. Lengthen your spine by lifting your lower abdominal area (navel or “belly button”) in and up.
Avoid: Letting your lower ribs “flare out”, as this could create unnecessary compression in your lower back. To prevent this common mistake from happening, engage your core muscles. Lengthen your lower back by pressing your tailbone down towards the floor.
13. Press your chin slightly in and back to lengthen the back of your neck, aligning your cervical vertebrae with your thoracic spine.
14. Rotate your head to look over your right hand.
Tip: Use a soft, focused gaze on a point just in line with your right pointer finger. In yoga, this kind of “blurry” vision technique is called drishti or “yogic gaze” and can help to improve your concentration and activate a relaxation response.
15. Hold Warrior II Pose for at least 5 full breaths (5 inhales and exhales). To switch to the other side, first inhale as you straighten your legs. Repeat the above steps on your other side.
Tip: You can improve your pose by increasing awareness of your own anatomy. Your “thigh muscles” — made up of four muscles (also called the quadriceps) — make your leg move in all directions, including “internal rotation” and “external rotation” of the femur (thigh bone) at the hip socket. In Warrior II Pose, you engage your thigh muscles to create opposite movements in each leg. Here’s how:
- You externally rotate your front (bent knee) leg by engaging your outer thigh muscles.
- You internally rotate your back (straight) leg by firming up your inner thigh muscles.
Why does this matter?
The action of firming up your thigh muscles (quadriceps) helps to stabilize your pose and get all the great benefits of Warrior II.
Warrior II Pose Modifications for Different Body Types
If you are having trouble balancing in Warrior II Pose: Slide a chair underneath the thigh of your front leg (the leg with a bent knee). If the chair height isn’t right for you, then insert a thickly folded blanket. Repeat this on the other side.
If you want to deepen the stretch in your arms: Rotate your palms and inner elbow creases skyward whilst drawing your shoulder blades down your back. Then, keeping this external rotation in your arms, rotate your palms to face the floor again.
If you want to improve your alignment in Warrior II Pose: First, adjust your stance, by stepping your feet out wide and extending both arms, placing your feet directly under your wrists. Now, press your tailbone down towards the floor to lengthen your lower back and align your lumbar vertebrae properly with your pelvis.
If you tend to drop your front (bent) knee in: be sure to align your knee with your big toe whilst pressing your knee toward the pinky toe side of your front foot. This action engages the muscles of your hip and stabilizes your pelvis in Warrior II Pose.
If you tend to drop the front of your pelvis forward too much: lower your arms and place both hands on your hips to adjust your pelvis. Check that your front “hip points” (the big, flaring bones on either side of your pelvis) are even with each other. In other words, one should not be higher than the other. Evenly engage both thigh muscles. Your front thigh (the leg with the bent knee) is externally rotating whilst your back (straight) leg is internally rotating. This counteraction in Warrior Pose is what gives it its namesake: A powerful, stable stance with strong thighs to deeply stretch your hip muscles and invigorate this pose.
How Long Should You Hold Warrior II Pose?
I recommend holding Warrior II Pose for at least 5 full, deep breaths. If you feel discomfort in your knee, you should stop doing the pose and come back to it later or try one of the modifications of the pose explained above.
How Often Can You Do Virabhadrasana II?
Virabhadrasana II can be repeated three times on each side in one yoga practice session.
This is because Warrior II Pose is a vigorous pose for your leg muscles that provides a deep stretch in your hips and inner groin.
Many of my beginner students have complained of soreness in their groin after practicing Warrior II Pose repeatedly.
However, if you want to get all the benefits of this pose without repeating the same pose too much, then you can practice many variations of this pose.
Let’s look at some useful variations next:
Warrior II Pose Variations
Dancing Warrior II Pose
1. Straighten your bent knee leg as you inhale.
2. Raise your arms overhead.
3. Bend your front leg again as you exhale.
4. Lower your arms back down (parallel to the floor as in a normal Warrior II Pose).
You can repeat this “Dancing Warrior” sequence for at least 5 breaths (5 full inhales and exhales) on each side.
How to Transition from Mountain Pose to Warrior II Pose
1. Begin in Mountain Pose, an important foundational standing pose in yoga that helps you ground through your feet.
2. Step your left foot back in a wide stance. Keep your left foot slightly turned inward.
3. Rotate your hips to the left and bend your right knee into Warrior II Pose on your right side as described above.
4. Raise your arms parallel to the floor and extend.
5. Come into “Reverse Warrior”: Inhale as you slide your left hand down along the outside of your straight left leg, keeping your right knee bent as in normal Warrior II Pose.
6. Raise your extended right arm up overhead as you turn your gaze upward to your hand.
7. Exhale as you come back into normal Warrior II Pose.
Repeat this sequence on the other side.
How to Transition from Warrior II Pose to Mountain Pose
1. Begin in Warrior II Pose on your right side (with right knee bent).
2. Come into “Half-Moon Pose”: Inhale and extend your right leg as you bring all of your body weight forward onto your right foot whilst extending your right hand down to touch the floor and your left leg straight (parallel to the floor).
Tip: If balance in Half-Moon Pose is difficult, try placing a yoga brick in front of you and pressing your right hand onto the brick instead of the floor.
3. Actively stretch and extend your left leg parallel to the floor as you raise your left arm straight up (perpendicular to the floor).
4. (More advanced): If you are able to maintain your balance, consider turning your gaze skyward (up to your extended left hand).
5. Come back into Warrior II Pose on your right side (with right knee bent).
6. Inhale as you step your left foot to meet your right foot and return to standing Mountain Pose.
Repeat this sequence on your other side.
What are the Benefits of Warrior II Pose (Virabhadrasana II)?
- Lowers your resting heart rate.
- Enhances utilization of oxygen during exercise.
- It may relieve back pain[2].
- Opens the hips and shoulders.
- Strengthens the legs, abs, and arms[3].
- Gentle warm-up for your leg muscles in preparation for more advanced poses.
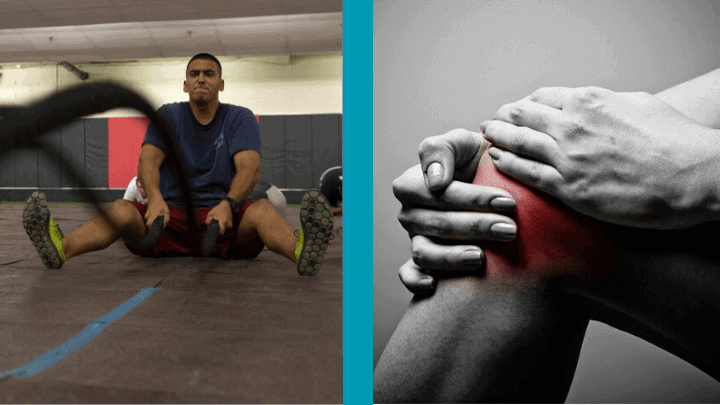
Who Should Not Do Warrior II Pose?
Warrior II Pose is contraindicated if you’ve had a recent injury to your knees, hips or shoulders, because this pose stretches these areas.
If you have chronic pain or a history of injury to your hips, knees or shoulders, then you should speak with a medical professional who can guide you with Warrior II Pose modifications.
- If you have this diarrhea or irritable bowel syndrome: Then you should avoid Warrior II Pose stretches your abdominal area and stimulates your intestines. Instead, practice these recommended poses.
- If you are on your third trimester of pregnancy: Then you should avoid Warrior II Pose because it deeply stretches your groin area. During late pregnancy, the ligaments naturally become more flexible, so doing this pose could result in injury or complications. Instead, try these six yoga poses that are suitable for your third trimester
- If you have high blood pressure: Avoid this vigorous pose and instead try these gentle yoga flows.
- If you have neck pain: You can still practice Warrior II Pose but it’s best if you make a slight modification. Instead of turning your head to look over your front hand, look straight ahead with both sides of your neck evenly lengthened.
What Muscles Does Warrior II Pose Work?
Virabhadrasana stretches the muscles of your entire body including the legs, inner thighs, groin, abs, chest, and shoulders.
Warrior II Pose may improve carpal tunnel syndrome[4], a condition caused by compression of the medial nerve that runs along the arm and wrist[5].
This is because you’re actively extending your arms and wrists throughout the pose.
If you have flat feet, doing Warrior II Pose may be therapeutic because of the active pressing down through the foot soles that is required in this pose: It helps to strengthen and tone the muscles in your feet and ankles, thereby counteracting flat feet and also preventing injury.
A Personal Warrior II Pose Story
During a yoga retreat I facilitated at an eco-lodge located in the tropical rainforest of southern Belize, two young boys eagerly participated in my sunrise morning yoga class with their dad (who showed up less eager with a cup of coffee).
After yoga class they would have breakfast and then embark on an overnight guided tour called “Jungle Survival” where their expert guide would equip each of the boys with necessary survival gear, including pocket knives, in case they happened to get trapped in one of the many vines that grow abundantly in the tropical jungle.
I decided to turn my yoga class into a physical and psychological preparation for the adventure that awaited them.
The two boys were overly excited, unlike their sleep-deprived dad, whom I surmised would need some motivation.
I instructed them to get into Warrior Pose and to imagine wielding their sharp swords in front of them with strong, extended arms, braced for battle.
They really got into it … and with a boyish smile on his face, so did Dad. By now he had set his coffee cup aside.
I told them how Warrior Pose is called Virabhadrasana in Sanskrit, the ancient language from India where yoga originated thousands of years ago. The boys glanced at their dad seeking to confirm the validity of what I was saying but he just shrugged.
“Really!” I continued, “This pose is thousands of years old, an ancient tradition based on a mythical warrior named Virabhadra who fought in many battles and even conquered demons!”
One of the boys lunged forward as he pretended to sword fight with his brother.
We invented all sorts of variations of Warrior Pose and had fun imagining we were real warriors in the middle of the jungle fending off dangerous animals like crocodiles, venomous snakes and voracious jaguars.
Standing, balancing, lunging, moving arms in all directions … we improvised and discovered how Warrior Pose is not only a great way to energize your body and stretch all your muscles, but it is also great fun.
With a stable base in a standing lunge, Warrior II Pose helps you focus on key actions in your hips, thereby helping you gain greater mobility and strength in your legs and pelvis.
Conclusion
Virabhadrasana, with its energizing and grounding effect, has become one of the most iconic and recognizable postures in yoga.
Have you ever watched someone pretending to sword fight?
You would see the person taking a wide stance to create groundedness and stability in the pose, whilst keeping the front knee bent and arms extended in preparation for the imagined onslaught.
Standing and lunging are the hallmarks of Warrior Pose, somewhat like a swordfight where the battle is in your mind: How will you face the most difficult circumstances of your everyday life with poise, strength and determination?
Consider this: The real battles are not on the outside; they’re on the inside.
I hope your practice of Warrior Pose will help you bravely conquer those inner demons and achieve victory in all your life’s endeavors.
Now I’d love to hear from you:
- What do you like the most about Warrior II Pose?
- When are you going to try it?
- Perhaps you’d like to share your experience with Virabhadrasana II?
What Next?
Why not check out some more Yoga poses that can help improve your flexibility and strength for specific sports like Badminton – Yoga For Badminton Players
Let me know by leaving a comment below and remember to follow us on Instagram for more great content.