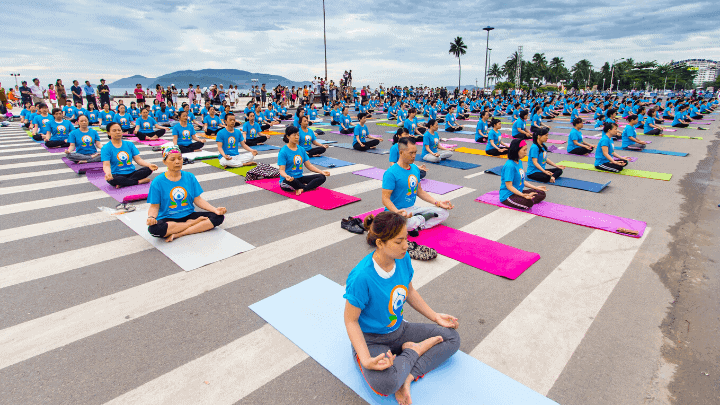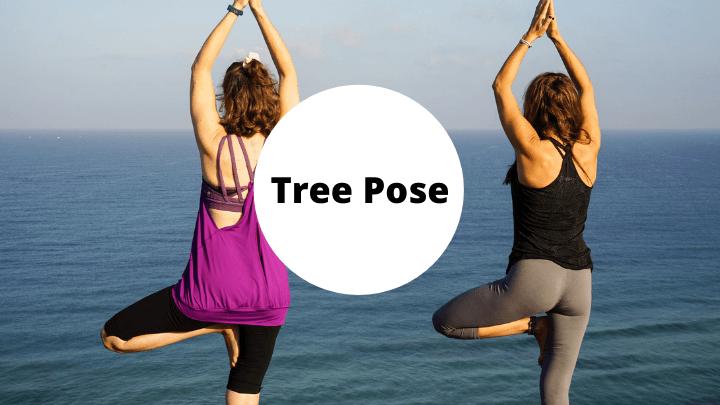
This is the most complete guide to Tree Pose (Vrikshasana) online.
If you want to:
- See video/text-based examples of how to do Vrikshasana
- Get access the most frequently asked Tree Pose questions
- Find examples of how to move from Tree Pose to other poses
Then you’ll love the detailed insights in today’s guide.
Let’s get started!
What is Tree Pose?
Tree Pose is a standing, balancing pose that helps you improve your concentration and increase your leg strength. The name Vrikshasana comes from the Sanskrit words vriksha meaning “tree” and asana meaning “posture”.
Vrikshasana helps you establish a steady, firm balance. When you practice this pose properly, you embody a tall, strong tree that is rooted to the ground, your arms reaching up like the branches of a tree.
I have been teaching and practicing yoga for over twenty years, and I have discovered how certain postures help me mentally as much as physically.
As a university professor, I am required to research and publish articles regularly.
If I find it difficult to focus on the task or my mind is distracted while working in my office, I stop whatever I am trying to do and instead practice Tree Pose.
After a few minutes of Tree Pose, I usually feel more focused, grounded, calm and centered.
I have taught thousands of yoga classes, mostly to beginners. “Tree Pose is all about balancing on one leg – something we’re not used to doing in everyday life,” I tell my beginner students.
The two most important elements in Tree Pose are (1) a long, tall spine – like a tree – and (2) a soft, steady gaze (called drishti in Sanskrit) to maintain your concentration and keep your balance.
If better concentration is something you want in your life, then Tree Pose is a great posture to include in your yoga practice.
Let’s now take a look at how to master this pose, along with some variations.
How to Do Tree Pose (Vrikshasana)
Disclaimer: Whilst Vrikshasana is suitable for most people, if you are suffering from lower back injury, are pregnant, or not used to physical activity; always consult your doctor before making a change in your lifestyle.
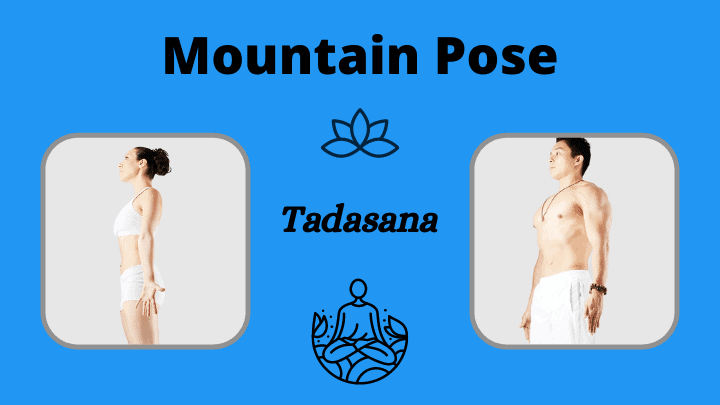
Step 1. Begin in Mountain Pose, standing with a tall, long spine with your arms beside your body.
Step 2. While in Mountain Pose, practice your drishti (soft, steady gaze at one point).
Step 3. Shift your weight onto your left leg. Straighten your left leg and engage your thigh muscle, lifting your kneecap.
Step 4. Firmly root your left foot to the ground.
Step 5. Slowly lift your right foot up off the ground, bending your right knee so that your right thigh is parallel to the floor.
Step 6. Imagine you are a tree, with roots extending from the sole of your standing foot deep into the core of the earth. This visualization can help you maintain your balance whilst standing on one leg.
Step 7. Reach down with your right hand and grab onto your right ankle.
Step 8. Place the sole of your right foot high up onto your left, inner thigh. Press your foot firmly against your inner thigh, pointing your right knee out to the side.
Step 9. Inhale and bring your palms together in front of your heart. Soften your shoulders.
Step 10. Tuck your chin slightly in and back, keeping your chin parallel to the floor. This action lengthens the cervical vertebrae in the back of your neck.
Step 11. Lengthen your spine: Keep “growing” your spine long and tall like a tree reaching up toward the sky.
Step 12. Maintain steady, full, deep breaths. With each exhalation, relax your body and bring a gentle smile to your face.
Tip: Keep your core muscles engaged by slightly activating your abdominal muscles.
Step 13. Exhale and slowly bring your hands down to your sides. Take your right hand to your right foot and gently release it from your inner thigh.
Step 14. Return to Mountain Pose (Tadasana) and take 3 deep, full breaths.
Step 15. While in Mountain Pose, find your drishti and create a long, tall spine as you did previously.
Step 16. Repeat Tree Pose standing on your right leg.
How long should you hold Tree Pose for?
Hold Tree Pose for 5-10 slow, deep breaths, then relax for 40-60 seconds.
How Difficult is Tree Pose?
Whilst Tree Pose may look easy and simple, it is one of the most difficult balancing poses in yoga.
This is because you have to balance on one leg and we rarely get the opportunity to do this in day-to-day life.
I always tell my students, “Honor your body.” Modify the pose if you need to. Remember that everybody’s body is different, and your pose may look different from another student’s or your teacher’s pose.
With consistent practice of Tree Pose, you will strengthen the muscles in your legs, ankles and feet, allowing you to remain steady and balanced for longer.
Then, you can make Tree Pose more challenging.
Let’s take a look at all the ways you can modify Tree Pose for different body types and needs:
How Can You Modify Tree Pose?
If you need to adjust your Tree Pose for better balance and alignment, then try these modifications (listed in order from easiest to most difficult):
Tree Pose in Chair
Step 1. Sit in a chair with your back straight.
Step 2. Straighten your left leg and bring your left heel down to the ground in front of you.
Step 3. Bend your right knee and lift your right foot up off the ground as you bring the sole of your right foot flat to your inner left ankle.
Tip: Your right knee should go out to the side as much as possible until you feel a sensation of stretch in your right hip joint.
Step 4. Raise your arms up overhead into a wide “V” shape.
Step 5. Hold this modified Tree Pose for several breaths, then repeat it on the other side.
Tree Pose Against the Wall
Do Tree Pose according to the instructions above.
If it is difficult for you to maintain your balance in Tree Pose, you can use a wall.
Here are 3 different ways you can use a wall:
1. Stand near a wall and place your hand firmly against it to help keep your Tree Pose steady.
2. Lean your buttocks against the wall while you practice Tree Pose.
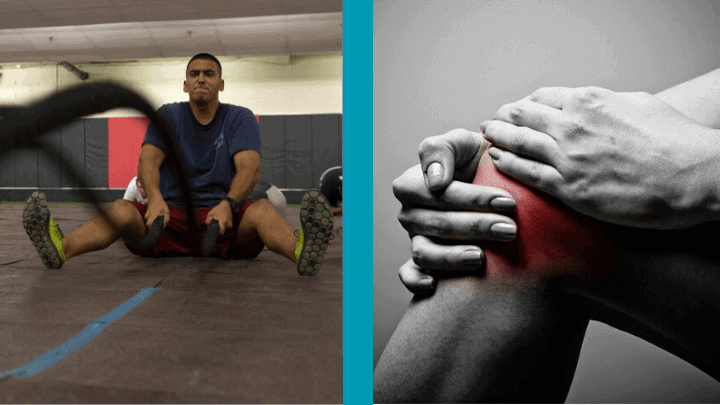
3. Gently press the kneecap of your lifted knee in contact with the wall. Be careful not to create too much pressure in your knee when doing so, especially if you have any knee pain, arthritis, or knee injuries.
Tip: If you have knee issues, keep the knee of your standing leg “soft” by creating a microbend in the knee on your standing leg. This will help you avoid overextension in your standing leg, which can exacerbate knee pain, especially in the case of injury.
Tree Pose on Your Toes
Do Tree Pose according to the instructions above.
Instead of placing your foot all the way up on your inner thigh, keep your toes pressing firmly on the floor like a “kickstand” and your heel pressing against your inner ankle. This can make balancing easier for you.
Place your hands on your hips to help you maintain your balance more easily.
Tree Pose on Your Calf Muscle
Do Tree Pose according to the instructions above.
If you are unable to bring your foot all the way up to your inner thigh, then keep your foot flat against your calf muscle.
Note: Avoid placing your foot against your inner knee if you have any knee pain, arthritis, or knee injuries.
Tree Pose with Eyes Closed
Need an extra challenge?
If Tree Pose seems easy and you would like an added challenge, here are some great ways to bring your practice of Tree Pose to the next level:
- Try closing your eyes while balancing in Tree Pose.
- Try Tree Pose on an uneven surface, such as a folded blanket or beach sand. This will activate and strengthen all the muscles in your ankles and feet, challenging your balance.
- Try “Bound Tree Pose”: Bring your foot into “Half Lotus” (Ardha Padmasana) by placing the outer edge of your lifted foot against the front of your upper thigh (instead of the sole of your foot flat against the inner thigh), then wrap your arm behind you, grabbing onto the big toe of your lifted foot.
How Can You Improve Your Balance in Tree Pose?
Try these tips to help you stay stable and balanced in Tree Pose:
- Spread your toes wide and firmly press the sole of your standing foot into the floor.
- Keep your thigh and buttock muscles actively engaged.
- Activate your abdominal muscles to engage your “core”.
- Relax your facial muscles. Try to avoid biting your lower lip or tightening your jaw.
- Practice, practice, practice.
What Are Some Common Mistakes in Tree Pose?
Getting Frustrated When You Fall Out of Tree Pose
Have fun and maintain a positive “I can do it” attitude.
Tree Pose is a challenge to your standing balance. It’s okay to lose your balance in this pose!
If you fall out of Tree Pose, try not to get frustrated. Keep practicing.
Tensing up Your Muscles
Relax and release your shoulders down away from your ears.
Glide your shoulder blades down your back.
Focus on your soft gaze at one point (drishti) and keep your spine long and tall.
Improper Hip Alignment
The pressure of your foot against your standing leg can cause you to jut your hip out too far on that side.
Keep your hips square by drawing your tailbone down and lengthening your spine.
How Often Can You Do Vrikshasana?
If you are a beginner, start by including one Tree Pose into your daily practice.
As you gradually build up your leg strength and develop your balance, you can repeat Tree Pose two or three times throughout the day.
If you are an advanced yoga practitioner, Tree Pose may become easy for you. Try adding one of the challenges described above.
As an advanced yoga student, you can practice Tree Pose as often as you’d like.
Tree Pose Variations
You can include Tree Pose into a sequence of yoga postures.
When including Tree Pose in any sequence, remember to maintain a long, tall spine and focus your gaze on one point (drishti) for the duration of your Tree Pose.
Flowing Tree Pose
- Come into Tree Pose as described above.
- Stand up straight and maintain an open chest by pressing your heart forward.
- Use modifications as necessary to make your posture as comfortable as possible.
- Inhale whilst raising your arms up overhead in a wide, sweeping arc. Take the length of your inhale to raise your arms up until your palms touch and your gaze is up to your thumbs.
- Exhale whilst releasing your arms back down to your sides in a wide, sweeping arc. Take the length of your exhale to release your arms back down beside you.
- Repeat this action, inhaling your arms up and exhaling your arms down, for at least 5 full cycles of breath or until you start to feel uncomfortable in the pose.
How to Transition from Tree Pose to Lightning Bolt Pose (Utkatasana)
- Come into Tree Pose as described above.
- Release your foot back down to the ground. Step your feet close together with big toes touching.
- Bend your knees, pressing your hips down and back. Imagine you are about to sit down into an imaginary chair.
- Press your hips and buttocks as far down and back as you can without falling backward.
- Extend your arms up overhead and gaze at a point between your palms.
- Maintain the position for 3-5 full, deep breaths.
How to Transition from Lightning Bolt Pose to Goddess Pose
- From your version of Utkatasana, release your arms down beside you and straighten your legs.
- Step your feet apart shoulder-width.
- Bend your knees into a low squat. Sink your hips down as low as you can.
- Bring your palms together into a prayer position at the level of your chest.
- Maintain Goddess Pose for 3-5 full, deep breaths.
How to Transition from Goddess Pose to Wide-Legged Standing Forward Bend to Mountain Pose
- From your version of Goddess Pose, release your arms down beside you, straighten your legs and step your feet out wider than shoulder-width to prepare for “Wide-Legged Standing Forward Bend”.
- Look down at your feet and make sure the insides of your feet are parallel or slightly pigeon-toed (big toes slightly pointed inward).
- Release your upper body down and grab onto the outsides of your ankles with your two hands. Bend your knees if needed to get a hold of your ankles.
- Press your elbows out to the sides as you pull on your ankles, stretching your entire spine long from the tailbone (coccyx) to your neck (cervical) vertebrae, pressing your forehead down towards the floor.
- Keep pulling until you feel a sensation of stretch throughout your entire spine and the backs of your legs (hamstrings). Straighten your legs to intensify the sensation of stretch through the hamstring muscles.
- Maintain Wide-Legged Standing Forward Bend for 3-5 deep, full breaths.
- Release your ankles and use the strength of your abdominal muscles to slowly raise your upper body whilst maintaining a long, straight spine.
- Step your two feet together and relax your arms down beside you.
- Come into Mountain Pose (Tadasana).
- Maintain a soft gaze on one point in front of you and hold Mountain Pose for 3-5 full, long breaths.
What Muscles Does Tree Pose Work?
Tree Pose stretches major muscles in your legs and back:
- Your shoulders and “swimmer’s muscles” (latissimus dorsi)
- The front of your thigh (quadriceps), inner thigh and outer thigh
- Your buttocks (glutes)
What are the Benefits of Tree Pose (Vrikshasana)?
Whilst balancing on one leg in Tree Pose, you simultaneously stretch and strengthen your thighs, buttocks, ankles and soles of your feet. This helps improve your standing balance.
Physically, Tree Pose has several benefits:
- Strengthens your legs
- Opens your hips
- Relieves sciatica
- Improves your standing balance and standing posture
Mentally and emotionally, Tree Pose has many benefits:
- Rejuvenates
- Invigorates and energizes
- Improves focus and concentration
- Calms your mind
- Helps you maintain “balance” in your life
Even if your standing balance is unsteady, Tree Pose can be modified to suit your particular body type.
Want to know the best part? You can improve your standing balance and practice Tree Pose in the comfort of your own home. Check out our guide on how to practice yoga at home.
Who Should Not Do Tree Pose?
Tree pose is not recommended if you have pain, injury or arthritis in your knees or hips. If you do, you should especially avoid placing your foot against your inner knee and instead place it on your calf or inner thigh muscles.
If you have vertigo, dizziness or other conditions that make it hard for you to maintain a standing balance, you can modify your Tree Pose by holding onto a chair or pressing your hand against a wall.
You can also keep your hands on your hips if you have balance issues.
If you have shoulder pain, numbness, tingling, or shooting when you lift your arm, try keeping your hand on your hips.
As with all yoga poses, don’t force anything. Listen to your body and if anything feels uncomfortable, then stop immediately or ask a qualified yoga teacher to help you modify the pose.
Conclusion
Tree Pose is a great pose to increase your mental concentration and improve your standing balance.
By practicing Vrikshasana, you not only strengthen your leg muscles, but you also strengthen your mental stamina, willpower and focus, helping you maintain a healthy balance in all aspects of your life.
Now I’d like to ask you:
What do you like the most about Tree Pose?
When are you going to try it?
Perhaps you’d like to share your experience with Vrikshasana?
What Next?
Why not check out some more Yoga poses that can help improve your flexibility and strength for specific sports like Badminton – Yoga For Badminton Players
Let me know by leaving a comment below or by sending a direct message on Instagram.